POKEMON BLACK AND WHITE WALKTHROUGH
Another Bianca Battle and Route 6
Heal at the Pokemon Center if necessary and then try to leave Driftveil City's northwestern exit. Since we've gone almost an entire page without another tedious Rival battle, Bianca will walk up and put a stop to this.
Bianca's roster has changed little since your last encounter and, with four Pokemon at Levels 26-28, she should be pretty easy to take down after Clay. She leads with Herdier and, since it has Intimidate, you should start with a Special attacker and then either use that or switch to a Physical attacker. Your strongest STAB moves, particularly the Fighting-type attacks of Pignite or Gurdurr, should put it down easily. Ghost-types should avoid its Crunch, though. Musharna's moveset is mostly defensive, and anything that resists or has immunity to Psybeam will beat her if you have some Awakenings or Full Heals for Hypnosis.
Bianca's other two Pokemon are quite predictable now: use Grass-types or Blitzle against Dewott and Panpour; Water-, Rock-, or Ground-types against Pignite and Pansear; and Pansear, Trubbish, Vanillite or one of the Bug- or Flying-types against Servine and Pansage. Although she might use some healing items, you do have Scald and Grass Knot TMs to even the odds. Bianca gives you $3800 and, more importantly, HM02 - Fly, which is convenient since you just earned the ability to use it on the overworld.
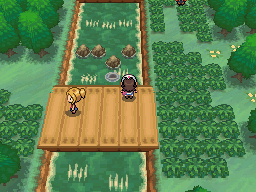
Heal at the Pokemon Center if Bianca gave you trouble and then go west into Route 6. Recurring faces in the tall grass include Sewaddle's evolution Swadloon, Pidove's evolution Tranquill in spring, summer and autumn, and Vanillite in winter. New, however, are the Normal/Grass-type Deerling, who changes colors with the seasons and evolves into the decent Physical attacker Sawsbuck; the Bug-type beetle Karrablast, who evolves into Escavalier, a slow but powerful and sturdy Bug/Steel-type, when traded for a Shelmet; and the Grass/Poison-type mushroom/Pokeball impersonator Foongus, whose line is the only one in
Unova that gets Spore, despite having a subpar typing, low Speed and average other stats. Note that many of the item balls on Route 6 are actually Foongus, much like the Voltorb of Kanto's Power Plant in older games.
Follow the tall grass north and you'll fight the Route's first Trainer: a male Scientist with a Deerling. Although you might see a Pokeball surrounding by some trees here, you can't reach it until you get Surf, so continue across the bridge and go north. You'll find a female Pokemon Ranger who has an Emolga and a Deerling; as usual, you can speak to her after the battle and she'll give you a Cheri Berry. Continue north to the upper bridge, defeating the Parasol Lady's four Tympole along the way, to reach the other side again, where you'll find a second male Scientist who owns a Deerling. Beyond him is a female Scientist with a Deerling for a change of pace. The building in the north is a research facility that studies the seasons, explaining the Scientists and their season-based Pokemon. Inside, you can show the left Scientist each of Deerling's four forms to receive a Leaf Stone. Grab the Hyper Potion next to the research center, as well as the Elixir in the tall grass behind the fence to the south.
Trek west of the female Scientist and you'll discover an open field with tall grass, more Trainers and several item balls, which are all actually some Foongus in disguise, if you're having trouble finding them and want to catch or see one. After defeating the second Foongus, an item ball is left behind containing a Leaf Stone, if you need one to evolve Pansage. The two Trainers here are a Parasol Lady who has a Vanillite and a Frillish, as well as a male Pokemon Ranger who uses a Minccino and an Emolga. He too will give you a Cheri Berry after losing, and north of him is another short bridge that leads to a house where a woman will heal your Pokemon. Her daughter will give you a Shiny Stone, which evolves Minccino into Cinccino. Surrounding the house's northeast perimeter is some double battle grass with the same Pokemon from earlier in the Route, but you can also just go north through the regular tall grass. Either way leads to Chargestone Cave, the next dungeon.
Approach the yellow spider's web and examine it to make Clay and his assistant come up from behind. His assistant will bash down the spider web, at which point Clay will finally give you TM78 - Bulldoze. Since it always lowers the Speed of the target, Bulldoze is a pretty useful move for getting through the game, so feel free to teach it to a few of your Physical attackers. After giving you his TM, Clay and his helper will leave, allowing you to enter Chargestone Cave.
Chargestone Cave - First Floor
Chargestone Cave is the game's first true cave-based dungeon, featuring several new Pokemon, floors and Trainer battles. As you enter, two pointless henchmen will teleport in and drag you two feet over to N so he can ask you another question, which you can answer however you'd like, before noting that Ghetsis wants to see your power and leaving. The only repeat Pokemon here are Boldore, the evolved form of Roggenrola, and Drilbur, who only appears in dust clouds. Since the cave is quite obviously lightning-themed, it offers two new Electric-types: the rare lamprey Tynamo and the spider Joltik. Joltik evolves into the tarantula Galvantula, a decent Special Attacker with good Speed, and both have the new, unique Bug/Electric-type but mediocre movepools.
Tynamo is a pure Electric who evolves into Eelektrik and Eelektross, the latter of which has quite solid stats and no weaknesses thanks to its Levitate ability. Also new are Klink and Ferroseed, with Klink being a pure Steel-type but Ferroseed having the unique Grass/Steel-typing. Both reach their final stages quite late, but the Steel-typing is invaluable due to its resistances. Ferroseed's evolution Ferrothorn is very slow but quite sturdy with good Attack, while Klink becomes Klinklang, who has more evenly-distributed stats. Any of these Pokemon are worth catching.
Continue north and you'll notice a stone with small bolts of electricity dancing around it. Oddly, you can walk right through these bolts and not get hurt, despite the game making a crackling noise as you walk through them. A bit further up, your path will be blocked off. Bianca will come and explain that some of these floating stones are movable, but she doesn't mention that they need to pushed toward the larger magnetic rocks to move. Professor Juniper also comes, explaining that she's here to research Klink, and then gives you a Lucky Egg, a great hold item for training that doubles EXP that your Pokemon receive.
Push the stone above Bianca to the left to proceed through the path, which ends at another crystal to be pushed right. Pick up the Parlyze Heal on the ground, head up the right stairs to beat a Scientist with a Klink, and then push aside the crystals below him to reach a Revive and go up the other stairs. A Heal Ball is in the northwestern corner here, and further east is a male Ace Trainer who has an Archen. An Elixir is hidden in the dead end to his northeast. Trek through the path behind him and push the upper crystal to the left, and then the lower crystal to the south. A bit further east on this path, Juniper and Bianca will update you on their research.
You can ignore the crystal at the spot where Juniper and Bianca talk to you, but there's now a split in the path. For now, the northern branch leads to a dead end, since there's a stone that you can't move yet, but you can fight the Hiker who has a Boldore and a Gurdurr right now. Hidden near him is a Max Potion if you want to hunt that down. Take the southern path and some more of
Team Plasma's
ninjas henchmen will teleport in, drag you across a bridge, and note that Team Plasma is waiting for you downstairs. The item ball near here is a Hyper Potion, so pick that up and move the next stone to the south to get through the narrow opening. Follow the land here to find a female Scientist who owns a Klink and some stairs that lead to the lower level. Before going downstairs, push the lower stone here to the left and maneuver around to the item ball, which contains an Iron to provide ten Defenses EVs to one of your Pokemon.
Chargestone Cave - Basement Floors
We're now in the basement, although the wild Pokemon aren't any different, so head left a bit and you'll find two guys standing around. They'll introduce themselves as the Nugget Brothers and each give you a Nugget, a useless item that you can sell for an easy $5000. Far left of them is an exit that takes you back upstairs, but it's really only a shortcut if you need to leave Chargestone Cave in a hurry and thus can be ignored, although there is a hidden Parlyz Heal on the ground after the row of three small floating crystals that you can't move.
Head up the stairs next to the Nugget Brothers to find a few more branches leading north. A Timer Ball is in the northwest corner, and a Doctor with a Swadloon is on the western path; he'll heal your Pokemon after the fight, which is useful because about ten Plasma Grunts are along the path to your north. Just left of the Doctor is another Revive hidden on the cave's wall. You'll fight, in order, a male with a Sandile, Watchog and Scraggy; a second male who has only a Scraggy; a female who uses a Trubbish and a Liepard; a second female who has three Trubbish; and a third male who uses Watchog and Sandile.
After the fifth Grunt, you'll find a few more pushable rocks, so move the closest one of the left and travel through to find a Thunderstone, which evolves Tynamo's evolution Eelektrik into Eelektross. Reverse your steps to the last rock you moved, and push up the other stone to find two more Plasma Grunts: a female who has only a Liepard and a male who uses Sandile and Watchog. Before continuing up the stairs on the right here, go down the stairs to the left and into the second basement floor. Proceed south here, beating the female Ace Trainer with a Drilbur and a Zebstrika, and push the crystal to the right to find a few branched paths.
Head far west and then all the way north to find a BrightPowder at the end of the path; this lowers the Accuracy of attacks targeting the holder. Retrace your steps and continue going south to fight another Ace Trainer (named Stellaaaaa!) who has a Gothita, Lilligant and Ducklett. Descend the stairs near her and collect the two items on this level, a Hyper Potion and a Rare Candy; also hidden down here are a Parylz Heal and Star Piece, so you can look for those with your
Itemfinder "Dowsing MCHN" before going back upstairs to the
Team Plasma Grunts and taking the right staircase.
Once you're back up on the ground floor of Chargestone Cave, you'll come up to a cross junction. The left way includes another male Scientist who has a Klink and eventually leads back to the blocked path near the Hiker from earlier. The road straight ahead features a male Ace Trainer who owns a Whimsicott and a Tirtouga just above a dead end with a Magnet, the Electric-type version of Miracleseed, Charcoal and Soft Sand. You can give this to one of your Electric-types if it's not holding anything better right now. Go back up to the cross junction and head right to finally encounter N. He's once again ramble about his goals and ask you another question, which you can answer however you'd like, before challenging you.
Continuing his tradition of following the Nuzlocke Challenge, N yet again has a totally new team from your last encounter with him. He now owns the four common Pokemon that you can find within the Chargestone Cave: Boldore, Klink, Joltik and Ferroseed. By now, you should have plenty of experience fighting these Pokemon thanks to this game's encounter rate. Boldore will fall easily against any of the Starter Pokemon's STAB attacks - Fighting-type ones in Pignite's case - as well as whichever of your Pokemon knows Scald, Bulldoze and/or Grass Knot. Bulldoze, along with Fighting- or Fire-type attacks, will also make short work of both Klink and Ferroseed, the latter of which possessing a 4x weakness against Fire-type moves. As a Bug/Electric-type, Joltik takes normal damage from Ground-type moves, but it's still pretty fragile and you can pinpoint its Bug-type weakness of Fire, Rock or Flying to take it down. Tepig players are particularly in luck here since it can take down all four of N's Pokemon. Bianca and Juniper will come up after you win and Juniper and N will exchange a few words before N leaves. Follow him out to reach Mistralton City.
Mistralton City
Mistralton City is home to the game's sixth Gym as well as the Pokemon World's only known airport up to this point. Note that the airport has different surroundings depending on your Version, with White's being more natural and Black's having more manmade architecture; regardless of Version, it should be raining here. Head north as you enter and two people will come up: Cedric Juniper, the father of the good Professor, and Skyla, the Mistralton City Gym Leader. Since you've seen a Klink, Mr. Juniper will upgrade your
Pokedex so that you can switch between the forms of Pokemon that have more than one kind. Skyla drops references to Kanto and Sinnoh before noting that she'll battle you after checking out the Celestial Tower. Since she pilots the cargo planes here, she noticed a sick Pokemon at the tower during her last flight, and says that you can follow her if you want to help.
In the Pokemon Center is a man at the counter who can tell you the Hidden Power types of your Pokemon. In the eastern house, you'll find
Unova's Move Relearner (the woman) and Unova's Move Deleter (the older man). As usual, the Move Relearner wants a Heart Scale to teach your Pokemon any move from its natural level-up set, while the Deleter is the only person who can remove HMs from your Pokemon's sets. As the boy notes, you can get Heart Scales from the woman in Driftveil City.
At the Cargo Service northwest of the Pokemon Center, one of the women inside gives you a Sharp Beak, which grants a 20% boost to the power of the holder's Flying-type moves. You can explore the runaway outside to find TM58 - Sky Drop, a Physical Flying-type move that has the user drag the target into the air, where both will spend the next turn. At the bottom of the runway, use your Dowsing MCHN to locate several hidden items: a Paralyz Heal, a Repel and a Max Ether. The Gym is at the top of the runway, but Skyla obviously isn't there right now, so follow her onto Route 7 from the City's northeast exit.
Route 7
Route 7 has several Pokemon Trainers and wild Pokemon in the tall grass, although only one here is new: Cubchoo, the adorable Ice-type baby polar bear, who will only appear during the winter season. While Cubchoo and its evolution Beartic are pure Ice-types, which is not particularly useful, they do provide some cuteness as well as some needed Ice-type moves if you skipped out on Vanillite. Talk to the first girl on the ledge to your left and she'll give you TM57 - Charge Beam, a somewhat weak Special Electric-type move that has a 70% to raise the user's Special Attack by one level. If you keep on this ledge, there's a male Backpacker who has one Simisear before the path leads back into the very tall grass, which contains an Ultra Ball and two Youngsters: the left one with Palpitoad, Shelmet and Scolipede, the right one with Dwebble and Simisage.
There's also some walk ways on this route and, as the convenient nearby NPC explains, you'll fall off them if you stand still. Take the walk way or the regular path further north to find a house where a Hiker will trade your Boldore for his Emolga, which is one of the least balanced in-game trades ever. Further west, you'll encounter a male Ace Trainer who has Watchog, Swoobat and Liepard; this is a regular Triple Battle in White, but a Rotation Battle in Black. Keep going north here to find a female Backpacker, who owns a Minccino, next to another elevated walk way. If you stick to the low ground, you'll fight two Pokemon Rangers - a female with Swadloon, Simipour and Tranquill, a male with Solosis and Axew, and both giving you Aspear Berries after losing - as well as a PP Up in the tall grass.
You can go east if you want to level up some more, but you'll eventually reach the entrance of Twist Mountain and be denied passage until you get the sixth badge. Instead, head directly north from the Rangers to Celestial Tower, grabbing the Max Ether just before the entrance, so you can help Skyla before achieving this goal.
Celestial Tower
As with similar Towers in previous Pokemon games, Celestial Tower serves as a graveyard for departed Pokemon while also being inhabited by Ghost-type Pokemon. There's nothing much to see on the ground floor, so head upstairs, where you'll encounter the main Ghost-type here: Litwick, the series' first Ghost/Fire-type, a candle-based Pokemon. In addition to a creative design, Litwick's final evolution Chandelure has the highest Special Attack stat of any Pokemon up to this point, so you might consider getting one. Also on the second floor is a small maze of tombstones, which houses a few Trainers, including a female Psychic who has Elgyem, Solosis and Sigilyph; a Lass who has Deerling and Gothita, along with a Hyper Potion behind her; a male Pokefan who uses Emolga and Herdier; and a female Pokemon who owns a Swadloon. Near her is TM61 - Will-o-Wisp, a Fire-type attack that burns the opponent, so grab that and head upstairs.
The third floor has several forced battles against Psychic trainers of both genders. You might also encounter Elgyem in wild battles here; this is a Psychic-type extraterrestrial Pokemon who evolves into Beheeyem, a slow but otherwise decent Psychic-type. The first Psychic is a female with a Musharna, followed by a male with a Yamask and Golett, a female using Litwick and Swoobat, and a male who owns Duosion. Behind this particular Psychic is a Spell Tag, which is the Ghost-type variety of hold items that increases a move of the type's Power by 20%. A Nurse is below these Psychics, and she'll heal your Pokemon after defeating her Gothita and Alomomola. Continue up to the fourth floor, which TM65 - Shadow Claw, one of the best Physical Ghost-type moves, behind some gravestones to the northwest of the stairs. Otherwise, this area holds a male Ace Trainer with a
Stoutland and a female who has Swoobat and Gothorita. Grab the Revive behind the male Ace Trainer, and ascend the stairs to reach the top floor of the Tower.
On the roof of Celestial Tower, you'll find Skyla and learn that her keen pilot's eyesight was indeed right - a Pokemon was injured and had landed here, but she gave it a Max Revive and it flew away. She'll let you ring the Celestial Tower's bell, which is known to soothe the spirits of departed Pokemon, and then she'll agree to have a match back at her Gym and leave the Tower. There are wild encounters up here, too, but they're the same Pokemon as the ones on the lower levels, so you can now either Fly or walk south back to Mistralton City and enter the Gym at the top of the runway to begin the fight for the sixth Gym Badge.
Mistralton City Gym
As always, the first guy in the Gym provides a Fresh Water and some tips. Since Skyla is a Flying-type Gym Leader, her Gym is built around the gimmick of your Trainer being shot out of cannons to travel from destination to destination. Hop into the first mounted artillery weapon above you to land at a secluded area near another cannon. To progress, climb inside this one from the right to be shot west, and then go into the same cannon from the left to blast east to a Worker who has two Tranquill. The less noticeable stairway to the left here will bring you back to the center cannon, which will fling you back to the entrance of the Gym. To continue, ascend and follow the scaffolding path near the Worker to encounter a second Worker who has a Ducklett and a Woobat.
Get into the cannon near the second Worker to launch yourself left across the Gym, landing near a Pilot who has a Ducklett and a Sigilyph. You need to use the cannon near the Pilot to progress, but you can't approach this one from the left, or else it will shoot you back to the two Workers on the other side. Instead, come up from below and it'll blast you up to the higher parts of the Gym. The next platform is simply a matter of walking back and forth in a straight while using the cannon and defeating the Pilot's male Unfezant. Once you're in the top left corner of the Gym, head up the stairs, defeat the Worker's Swoobat. All that's left now is to hop into a series of launchers to be shot through some hoops (which unfortunately aren't on fire, although you are shot square into the wall from the final cannon) to reach Skyla. You can use the cannon behind her if you need to heal at the Pokemon Center.
Mistralton Gym: Skyla

Speciality: Flying |
 Swoobat Swoobat | Level: 33
Type: Psychic/Flying
Item: No Item
Ability: Unaware | Heart Stamp
Amnesia
Acrobatics
Assurance |
 Unfezant Unfezant | Level: 33
Type: Normal/Flying
Item: No Item
Ability: Big Pecks | Quick Attack
Air Slash
Leer
Razor Wind |
 Swanna Swanna | Level: 35
Type: Water/Flying
Item: No Item
Ability: Keen Eye | Aqua Ring
Aerial Ace
Air Slash
Bubblebeam |
Skyla is probably the hardest Gym Leader up to this point, which isn't really saying much. To her credit, her Pokemon know the move Acrobatics and aren't holding items, meaning that they all have a 110 Power STAB attack. Swoobat's main advantage is its high Speed, partially due to its STAB move Heart Stamp, which can flinch you. But it has low offensive stats, so it can't use Acrobatics, Heart Stamp or Assurance very well; it does ignore your stat modifiers with its Unaware ability, though. Skyla's female Unfezant, which lacks the head feathers of its pileated male counterpart, is completely useless against any Rock- or Steel-types you might have, as these Pokemon resist all of its moves, including Physical STAB attacks Razor Wind and Air Slash. Watch out for the cheap Quick Attack if your Pokemon is weakened. Finally, Swanna uses Aqua Ring to recover health and attacks with three STAB moves: Aerial Slash (Physical), Bubblebeam and Air Slash (both Special).
Key players in defeating Skyla include Gigalith, Vanillish or Cubchoo, and Zebstrika, Joltik or Tynamo. Since these Pokemon are Rock-, Ice- or Electric-type Pokemon, respectively, their STAB attacks all have advantages against Skyla. However, Ice-type attacks only do neutral damage to Swanna, Joltik takes neutral damage from Skyla's STAB moves and is fragile, and Gigalith, although fully capable of wrecking Skyla with its massive Attack and Defense as well as Rock Blast, will have to watch out for Swanna's Bubblebeam. Dewott/Samurott can be pretty useful here if you teach it Ice Fang via the Move Relearner, but Servine/Serperior is at a total loss and should be kept on the sidelines; Pignite/Emboar can work in a pinch if it still has Rollout, but it's pretty risky due to the Flying-, Psychic- and Water-type moves found here. A Pokemon that has Inner Focus is also helpful here since all of Skyla's Pokemon know Air Slash. Otherwise, focus on her type weaknesses for the victory. |
When you defeat Skyla, you'll receive $4200; TM62 - Acrobatics, a Physical Flying-type move with decent Power that doubles when the user is not holding an item; and the Jet Badge, which makes all Pokemon up to Level 70 obey you and allows you to use HM03 - Surf on the overworld to cross bodies of water.


 Herdier
 Musharna
 Pansear
 Dewott
 Tranquill (Lv 27 - 29)
 Swadloon (Lv 27)
 Vanillite (Lv 27 - 29)
 Deerling (Lv 26 - 28)
 Deerling (Lv 26 - 28)
 Deerling (Lv 26 - 28)
 Deerling (Lv 26 - 28)
 Karrablast (Lv 26 - 28)
 Foongus (Lv 27 - 29)
 Plusle
 Minun
Minun
 Unfezant (Lv 25)
 Audino (Lv 22 - 25)
 Leavanny (Lv 25)
 Emolga (Lv 23 - 25)


 Tynamo (Lv 27)
 Drilbur (Lv 24 - 27)


 Boldore
 Ferroseed
 Joltik
 Klink
Klink


 Watchog (Lv 31 - 33)
 Zebstrika (Lv 31 - 33)
 Cubchoo (Lv 30 - 32)
 Sentret


 Litwick (Lv 26 - 29)
 Elgyem (Lv 26 - 28)


Tidak ada komentar:
Posting Komentar